


Enabling SMTP Authentication is very important. Without connecting with SMTP Authentication your mail has a higher risk for getting flagged by other providers as spam when they are in fact not spam at all. So let’s just avoid this scenario by adjusting settings on your mail client.
Instructions for Enabling SMTP Authentication
Instructions for enabling SMTP Authentication vary depending on which mail client you are using. Below we have provided instructions for some of the most popular mail clients. If you need further information please be sure to let us know.

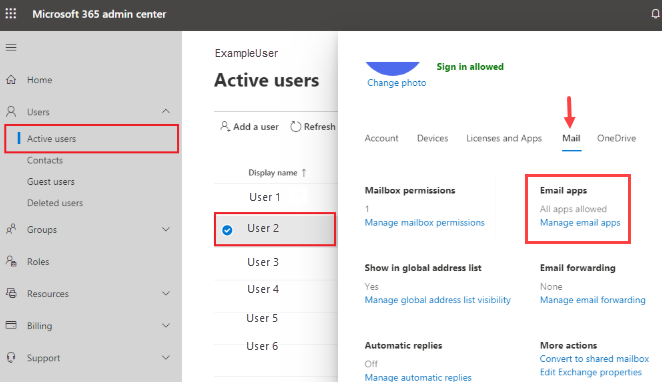
Microsoft 365
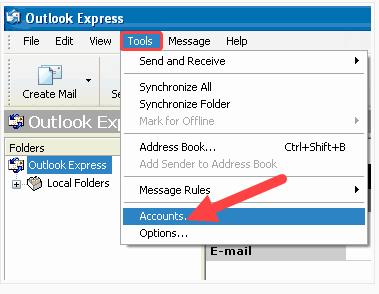
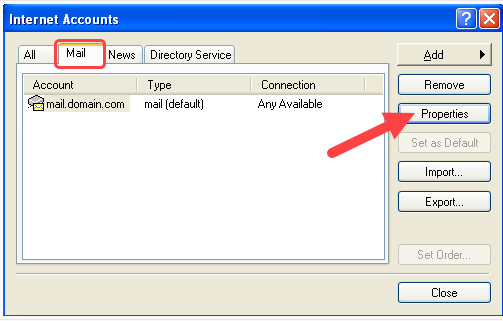
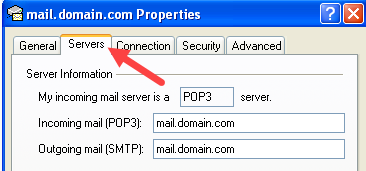
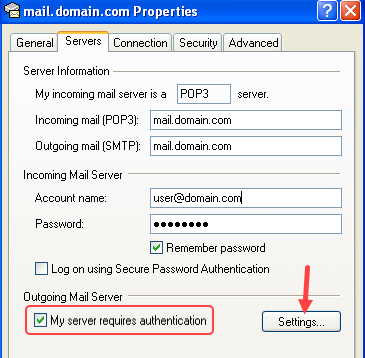
Microsoft Outlook Express
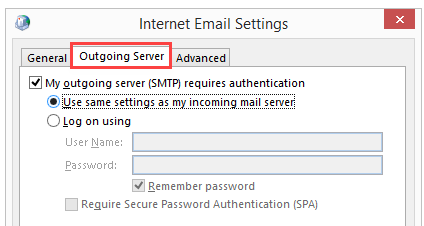
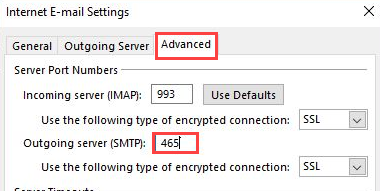
Outlook 2013 and 2016
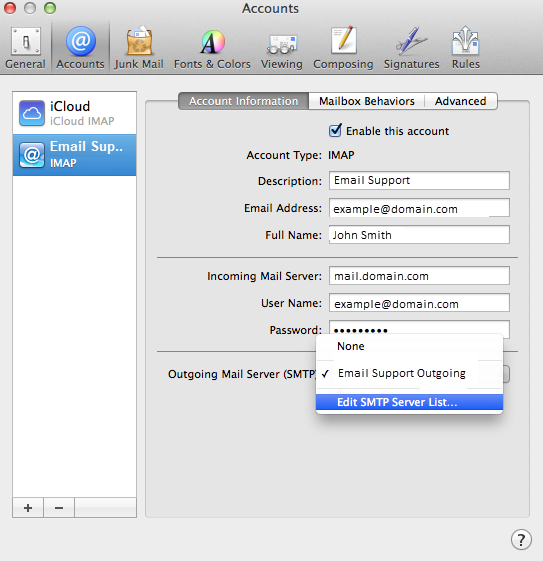
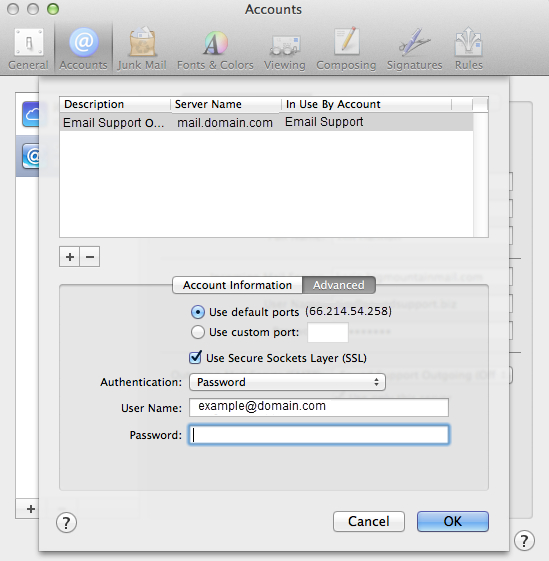
Apple Mail
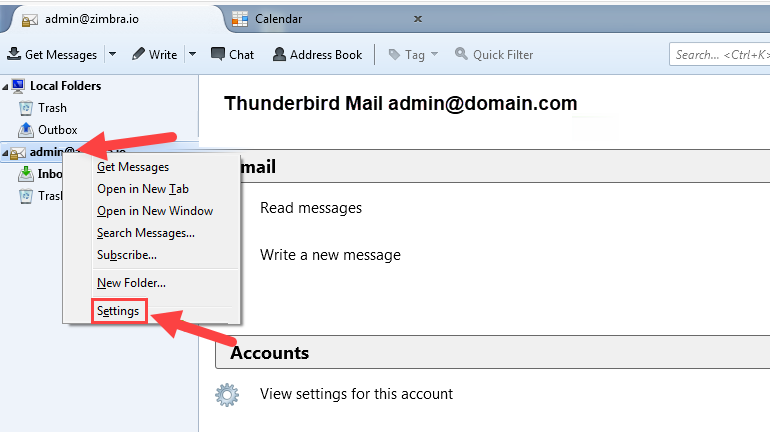
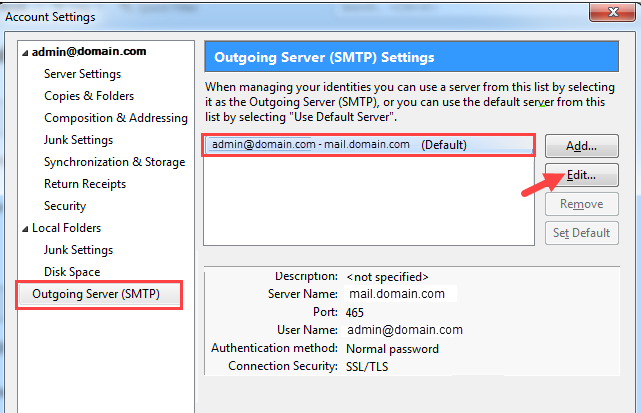
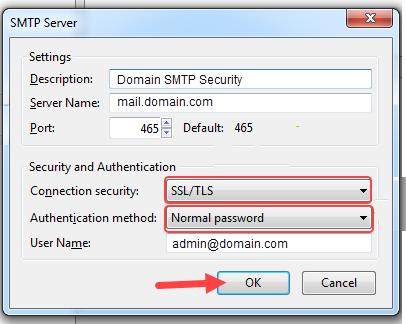
Mozilla Thunderbird
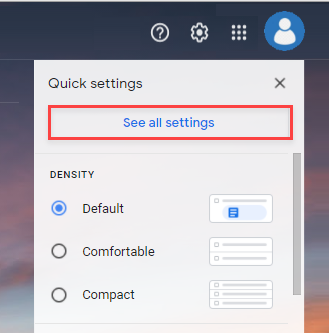
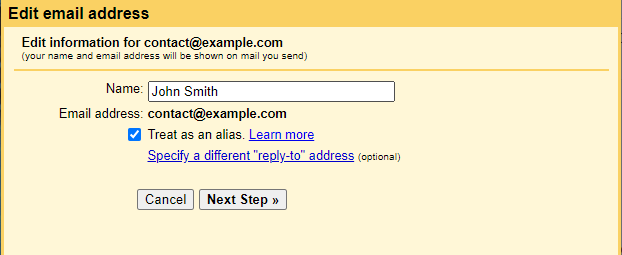
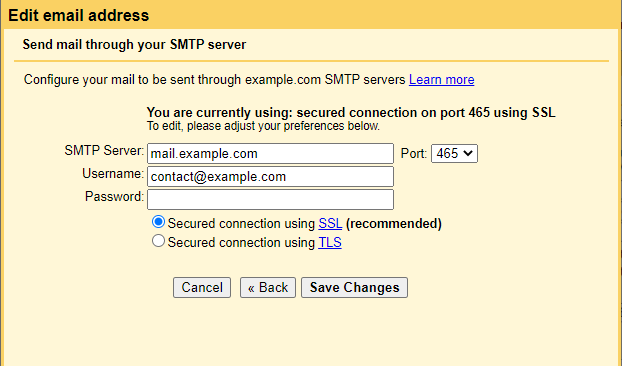
Gmail


